|
|
Automoblox in Autodesk Inventor
Automoblox person is another Autodesk Inventor based project. We started this project after we have finished all of our teacher's tutorial videos and learned all the basic Inventor skills. In this project, we have been taken into a much harder level of inventor. And the exciting differences about this project is that we actually get to 3D print our AI piece!
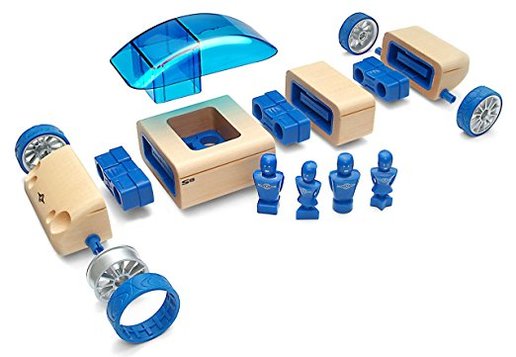
We first need to use a dial caliper to measure every details of the manufactured toy prototype--automoblox man, and record all the dimensions of the person into Engineering Notebook. I double checked all the dimensions before proceed using Autodesk because the dimension needs to be very accurate in order for the 3D printer to printed correctly and fit into the bases of the automoblox car like the prototype did. After accurately recorded all the views and dimensions of the automoblox person, I modeled the automoblox person in Inventor based on the prototype toy. This automoblox man is very complicated and has many dimensions, thus requiring using more functions. It in fact took me a lot of time to figure out which particular functions to use since it requires to use almost all the functions I learned in AI practices before.
We first need to use a dial caliper to measure every details of the manufactured toy prototype--automoblox man, and record all the dimensions of the person into Engineering Notebook. I double checked all the dimensions before proceed using Autodesk because the dimension needs to be very accurate in order for the 3D printer to printed correctly and fit into the bases of the automoblox car like the prototype did. After accurately recorded all the views and dimensions of the automoblox person, I modeled the automoblox person in Inventor based on the prototype toy. This automoblox man is very complicated and has many dimensions, thus requiring using more functions. It in fact took me a lot of time to figure out which particular functions to use since it requires to use almost all the functions I learned in AI practices before.
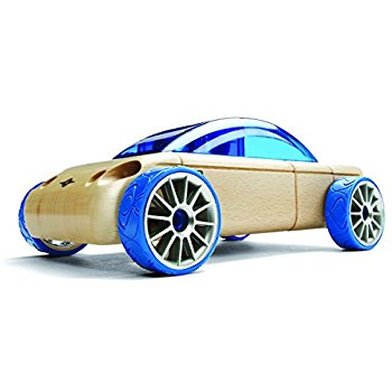
This is the Automoblox car the person needs to fit into. We first have to use a dial caliper to measure the Automoblox person, record them in to Engineering notebook, then model it in Autodesk. The goal of the project is to model the person into correct measurement so it can fit into the Automoblox car. It's very similar to Reverse Engineering.
|
|
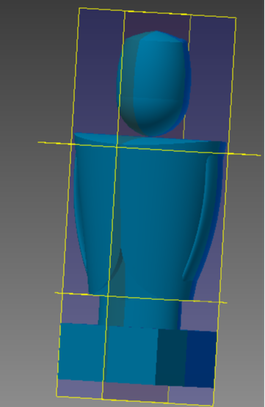
This is the completely modeled Automoblox person in Inventor.
|
|
The Automoblox Person in different views in Autodesk Inventor.
|
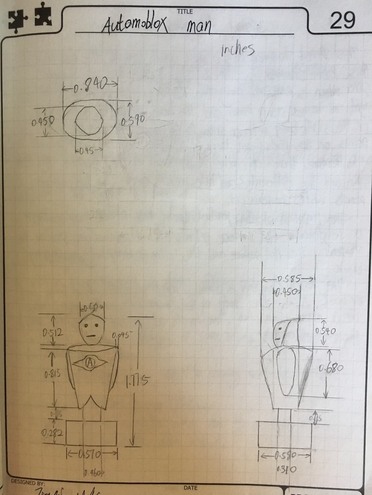
The Multi-View of the Automoblox person with measurement recorded in engineering notebook.
|
Comprasion of the Prototype and Product
Below are the Automoblox person in three different stages, includes the prototype, AutoCad Model, and 3D Printed Product
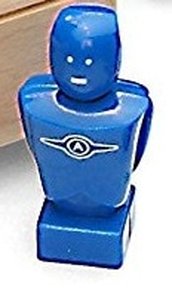
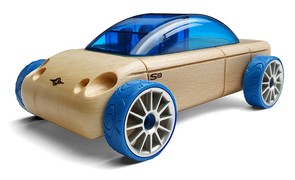
Prototype
This is the prototype Automoblox Person toy we suppose to draw in Autodesk.
|
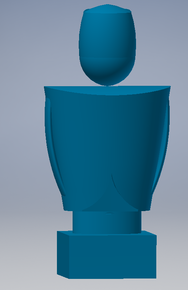
Model in Autodesk
This is what I 3D modeled in Autodesk after measuring the prototype using a dial caliper.
|
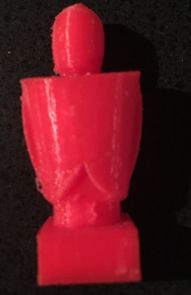
3D Printed Product
This is the final Product that printed out from the 3D Printer. Unfortunately, the 3D printer doesn't have the color Blue loaded, so it printed in a different color.
|
Conclusions
Building the Automoblox person in Autodesk is a challenging and stressful process. Although the prototype toy look pretty small, it contains many details and curves that is hard to measure and model. Despite the fact that measurements is hard to get, model the Automoblox itself can be even more frustrating. Many times, I got stuck on something such as finding a not closed loop in a sketch which result unable to extrude. I am pretty sure it's common to see annoying problems like this as I get into harder and harder pieces. However, there're better feelings in the world than the taste of sweetness when I have fixed my mistakes and received the 3D printed Product. This Automoblox project further improves my skills with Autodesk Inventor, and helps me understand what it takes to be a good engineer. In spite of the hardships I encountered in this project, I still enjoyed modeling in Autodesk. I love the joy of the completeness of a piece, and I believe all the obstacles I met during modeling will not slow down my design process as I try to overcome these obstacles with confidences and my constantly improving AutoCAD skills.
